
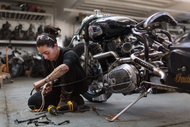
Are you tired of paying hefty fees for professional motorcycle maintenance? Noticing that you need to replace or upgrade your motorcycle parts is daunting enough, but the thought of an expensive mechanic bill can be overwhelming. The good news is that with the right tools and knowledge, you can remove and install motorcycle parts on your own! In this article, we’ll guide you through the process step-by-step, showing you how simple it can be to become your own mechanic. So, roll up your sleeves and read on to discover the freedom and satisfaction of DIY motorcycle maintenance with Powersport Junkies!
Table of Contents
- Understanding Your Motorcycle
- Essential Tools for Motorcycle Maintenance
- Step-by-Step Guide to Removing Parts
- Installing New Parts
- Common Mistakes to Avoid
Understanding Your Motorcycle
Before diving into removing or installing motorcycle parts, it's crucial to understand the specific model you own. Each motorcycle has different configurations, and knowing how your bike works will make the process smoother. Visit the user manual for detailed information on your motorcycle's parts and specifications. This knowledge will also help you when you're seeking aftermarket parts from Powersport Junkies, the leader in Powersports aftermarket components.
Essential Tools for Motorcycle Maintenance
To perform maintenance like a pro, you need to gather the right tools. Here’s a list of essential tools for removing and installing motorcycle parts:
- Socket and ratchet set
- Screwdrivers (flathead and Phillips)
- Wrenches (combination and adjustable)
- Torque wrench
- Shop manual for your motorcycle
- Oil catch pan (if changing the oil)
- Clean rags or paper towels
- Safety gear like gloves and goggles
Having these tools at your disposal will make the process efficient and ensure your safety. Don't forget, you can find various tools and kits on the Powersport Junkies website!
Step-by-Step Guide to Removing Parts
Now that you're prepared, let’s walk through the removal process:
1. Safety First
Before you begin, ensure your motorcycle is off and cold. Remove the key from the ignition, and, if necessary, disconnect the battery to prevent electrical shocks.
2. Identify the Part to Be Removed
Refer to your user manual to identify the part you want to remove. It could be the seat, headlight, exhaust, or even the engine components.
3. Gather Necessary Tools and Parts
Ensure you have the right tools handy, and if you’re replacing the part, have the new part ready. Check that it’s compatible with your motorcycle model.
4. Remove Screws and Bolts
Using your socket set or screwdrivers, carefully remove the screws and bolts holding the part in place. Keep these in a labeled container so they won’t get lost!
5. Carefully Take the Part Off
Gently pull the part away from the motorcycle. If it feels stuck, double-check if there are any screws or hidden clips you missed.
Installing New Parts
Once you have the old part removed, it’s time to install the new one. Follow similar steps:
1. Align the New Part
Position the new part in the correct place. It should fit exactly where the old part was. Consult the manual for guidance if needed.
2. Secure with Screws and Bolts
Use the original screws or bolts to secure the new part. Make sure they're tightened but do not overtighten them, as that can damage the parts.
3. Reconnect the Battery
If you disconnected the battery earlier, reconnect it. Ensure proper connections are solid and that there are no exposed wires.
4. Test the Installation
Before taking your motorcycle for a ride, take a moment to check if everything is secure. Start the motorcycle and test the new part. Listen for any unusual sounds.
Common Mistakes to Avoid
While it might seem straightforward, many novice mechanics make mistakes when removing or installing motorcycle parts. Here are some common ones to avoid:
- Not Reading the Manual: Always check your motorcycle’s manual before starting.
- Using Wrong Tools: Make sure to have the right tools; using the wrong ones can strip screws or damage parts.
- Skipping Safety Gear: Always wear gloves and goggles while working on your bike.
- Over-tightening Parts: Tightening screws too much can damage threads or the part itself.
Conclusion
Removing and installing motorcycle parts doesn’t have to be intimidating. With the right tools, knowledge, and a little bit of practice, you can do it yourself with ease. Not only will this save you money, but it also gives you a deeper understanding of your motorcycle and a sense of accomplishment. When it's time to purchase new parts or tools, remember to shop at Powersport Junkies for a wide selection of aftermarket motorcycle gear and accessories. So, what are you waiting for? Get started on your motorcycle project today!